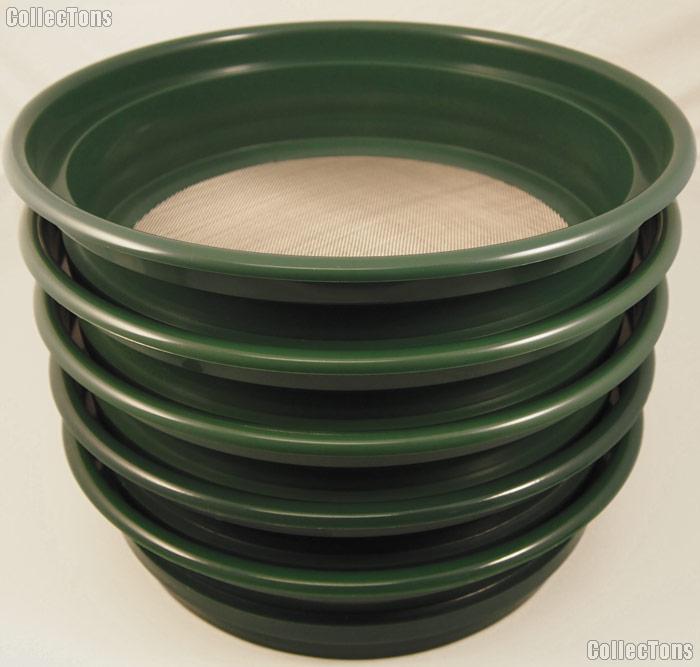
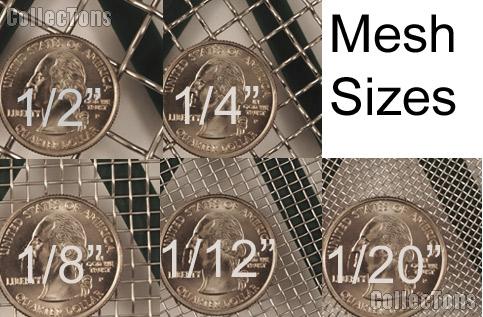
We are pleased to offer for sale this Set of 5 Classifiers - Gold Panning Equipment for Prospecting. This Gold Classifier Set includes 5 Gold Sifters of varying mesh size. The mesh sizes included in the Classifer Set for Gold Prospecting are: 1/2", 1/4", 1/8", 1/12", 1/20". Each Sifter has built in stainless steel mesh firmly attached to its green plastic frame. The dimensions of each piece of this ProspectingSifter Set are 13.25" for the upper diameter and 11" for the lower diameter, with overall height of 3.25". Gold Classifers are specifically made to work with multiple sized Mesh Classifiers in one stack. Gold Sifters sort out anything larger than their mesh size, generally rocks that you do not want in your gold pan, and allow for the panning step to follow. This Gold Sifter Set is an integral part of any gold prospecting kit, and has the added utility of fitting perfectly upon most 5 gallon buckets. This Set of Five Classifiers is new from our inventory.
Information on How to Pan for Gold!
Where can you find gold? With the right setup, some basic knowledge, patience, a little luck, and the right equipment, you can find gold in many places across the U.S.
Use classifier(s) to selectively filter out particles of different sizes. We recommend pouring into a 5 gallon bucket. Most prospectors that use these mesh strainers check through each layer for possible gold nuggets in with the rocks and debris and then scour the residual in their gold pan.
Shovel a small amount of strained material (4-5 handfuls) into your Gold Pan. Make sure all material in the pan is wet (It is advised that you keep the pan underwater while panning). Break up any clumps of material, and remove any rocks that you have not filtered out.
Swirl the Gold Pan in a counter-clockwise motion. Swirling does two things: I. Allows gold to begin settling at the bottom of the Gold Pan. II. Brings unwanted dirt and gravel to the top of the Gold Pan.
After swirling, switch motion to a gentle "side to side" motion which helps with the gold settling to the bottom of the Gold Pan.
Tip your Gold Pan and allow the water current to rinse off the top layer of dirt and gravel. **Be careful to only rinse one layer at a time, gold could be washed away if too much material is rinsed at once.
Slowly move your Gold Pan forwards and backwards to assist in the washing away of unwanted materials.
Repeat steps 2 through 5 until you only have a few spoonfuls of material left in your Gold Pan. This material usually looks like black sand.
Look in your pan for gold flakes or slivers. If they are present, swirl hard enough to keep them collected at the bottom of the Gold Pan.
 Check Out (
 Click for More Images